Webform.com Blog

Webform.com Release 1.12: Exporting!
Webform.com takes data-portability to a whole new level with full-site exporting.
Webform.com has always had the ability to export individual form submissions to a CSV or Excel file. This makes it easy to get your data into a spreadsheet program or Google Docs for making charts or creating custom reports. Today we're excited to announce that we're giving our users the new ability to export not just an individual form's results, but the entire configuration of that form and all the data associated with an entire site. This means that you can export all your forms, results, and files all at once into a single exported zip archive.
But that's not all... Webform.com is providing the source code for all of the form-creating functionality in a new Drupal distribution called Drupal Surveyor. This software distribution includes all the main modules utilized on Webform.com and an additional Webform.com Import module that will allow you to import a Webform.com site into your own self-hosted Drupal site.
How to Export Your Site
Step 1: Generate and Download the Export
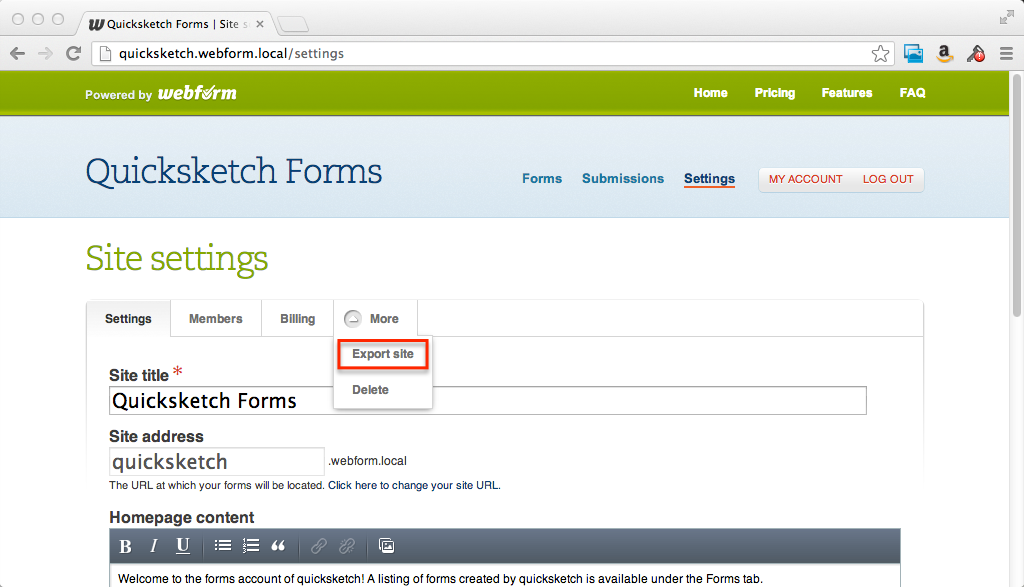
On every site, you'll have a new dedicated tool for creating an export. To access it, visit your site Settings page (mysite.webform.com/settings), and then under the "More" tab there is an option for "Export".
Once on the Export page, there is a simple button for "Generate Export". The export may take a few minutes if you have a large number of forms. You'll be presented with a progress bar as it is generated.
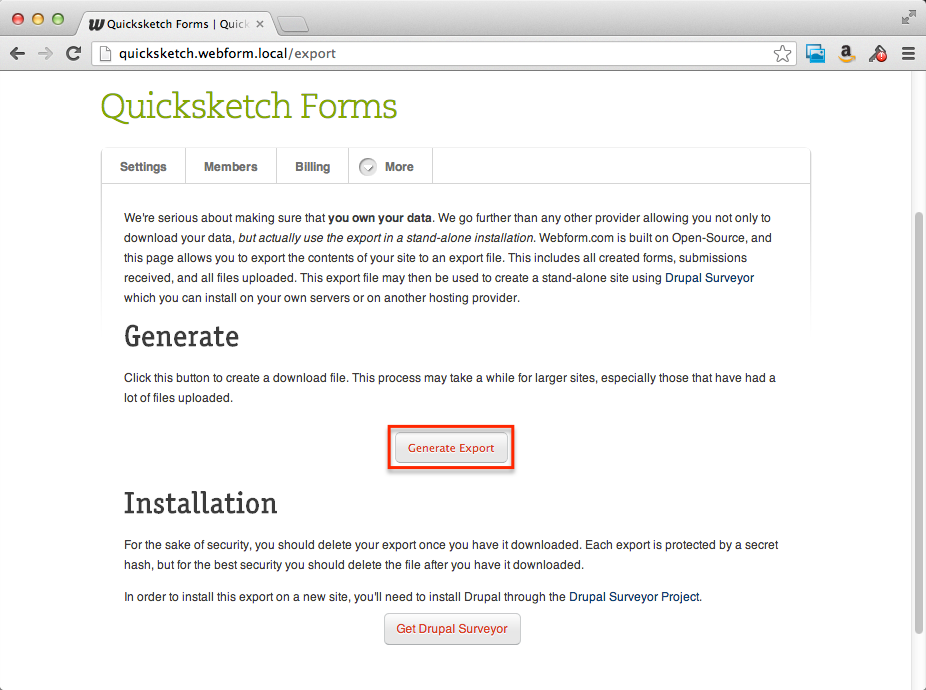
Once it is complete, you'll have a button for "Download Export". This will contain a zip file containing a SQL database dump and a directory of files.
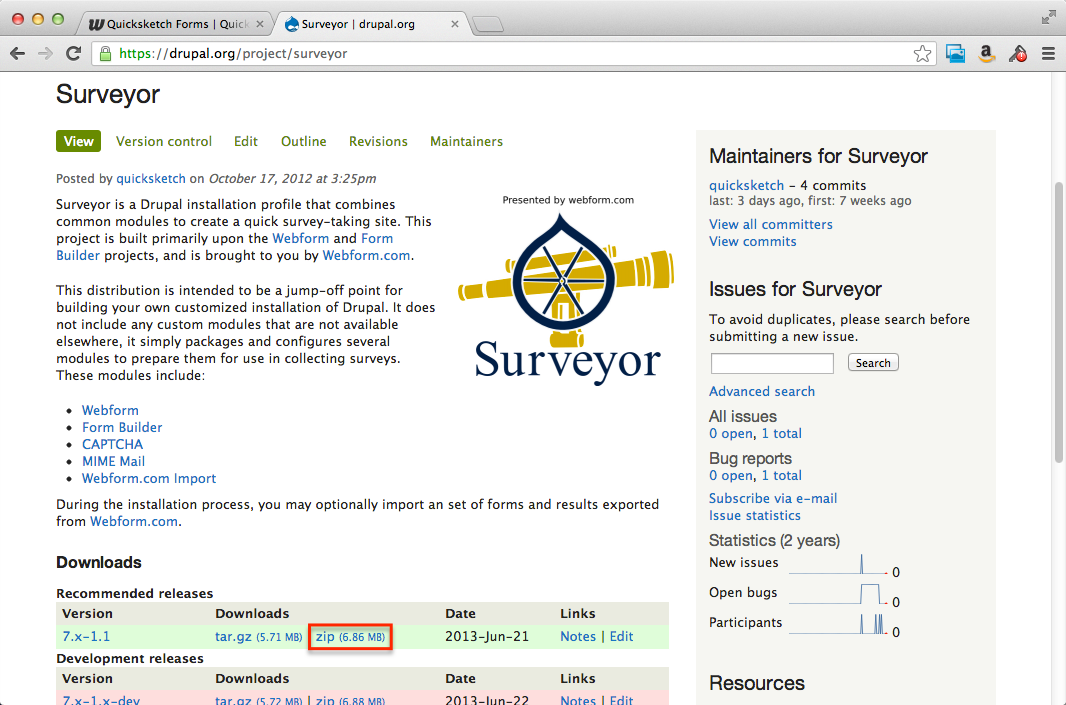
Step 2: Download Drupal Surveyor
Drupal Surveyor is a separate download available from drupal.org. This distribution of software packages together all the common modules that provide the main services of Webform.com. Download this installation to your computer (or server) and expand the zip file.
Step 3: Place Your Export In the Surveyor Directory
In the directory in which you install Surveyor (where the index.php file lives), place your export zip file that you downloaded in step 1.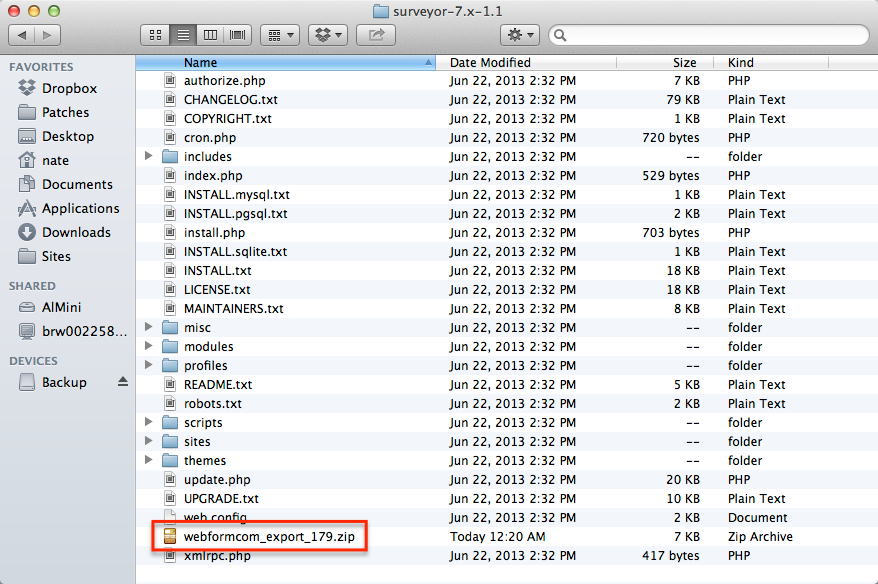
Step 4: Install Surveyor
Step 4 gets a bit tricky, because you have to run through all the normal steps required to install Drupal i.e. Set up a web server, database, etc. More information about setting up Drupal can be found in the Drupal installation guide. We're going to skip the database setup and common steps for installing Drupal.
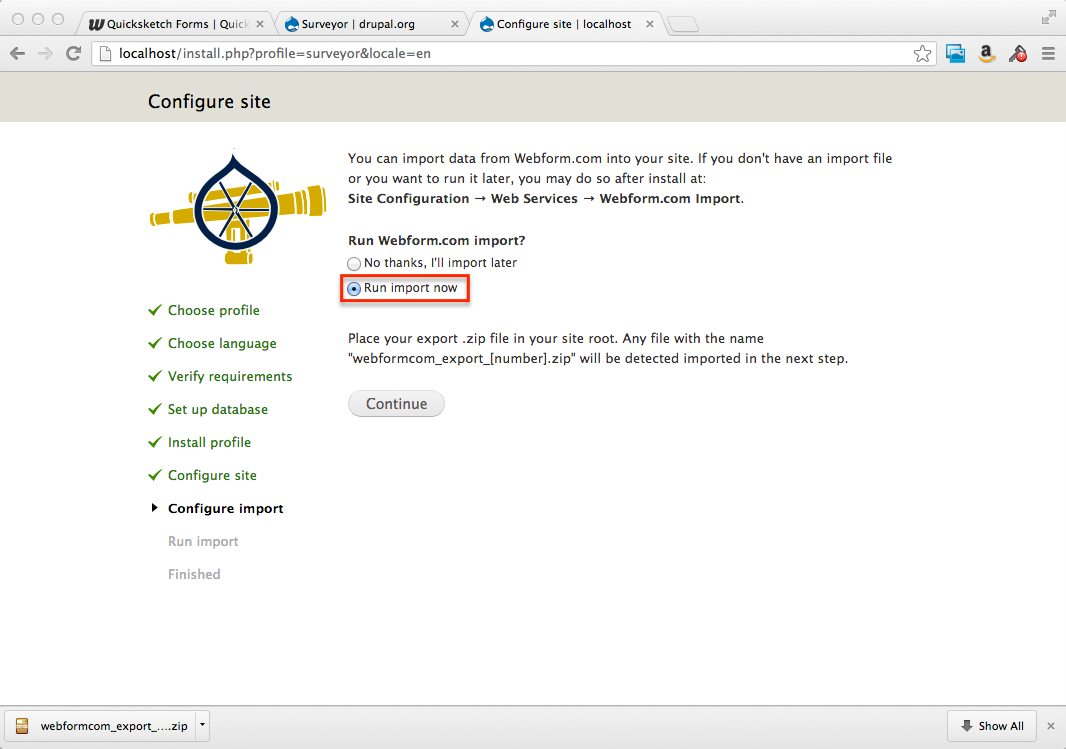
Install Surveyor as you would any other Drupal installation. There is no difference from the "Standard" installation except it includes a new suite of modules that are not included with Drupal normally, and these are loaded for you as part of the initial installer. There is however one extra step in the installer, which will import your data into your new site for you.
Step 5: Customize and Enjoy!
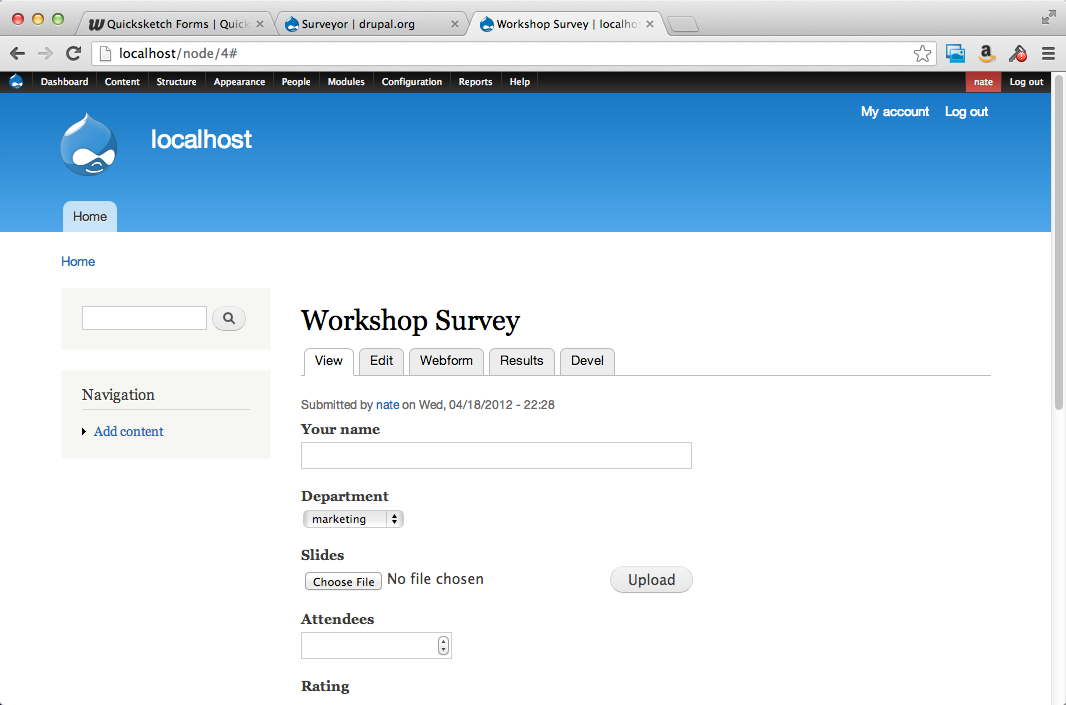
After you have finished the import, your site is now fully installed. You'll be taken to the standard new site homepage, with a list of your forms displayed. Each individual form will retain all it's submissions and files. You can install this software on your own server.
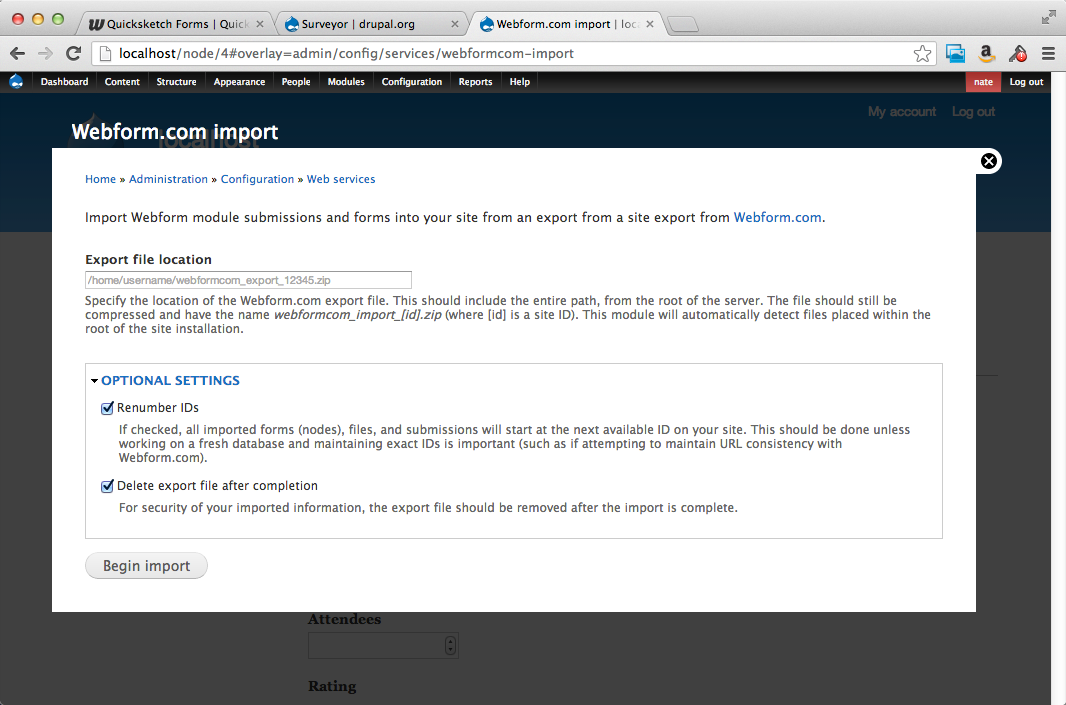
Bonus: Import into Existing Site
You don't have to start with a fresh installation of Drupal to import your data from Webform.com. You can also download the Webform.com Import module directly and install it into an existing website.
This new feature provides Webform.com with the ultimate in data-portability. Not only can you get the data out of Webform.com, you can actually do something with it. This makes it so that even advanced developers who prefer to host their own code can do so, while whenever they need a quick one-off form, they can count on Webform.com and export it later. We hope you enjoy it!